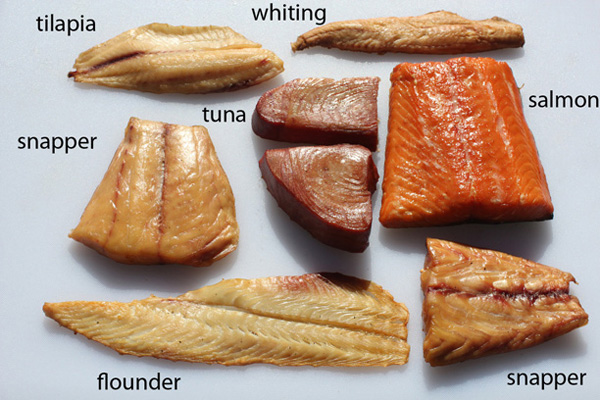
Meats and Sausages

Conditioning Fish for Smoking
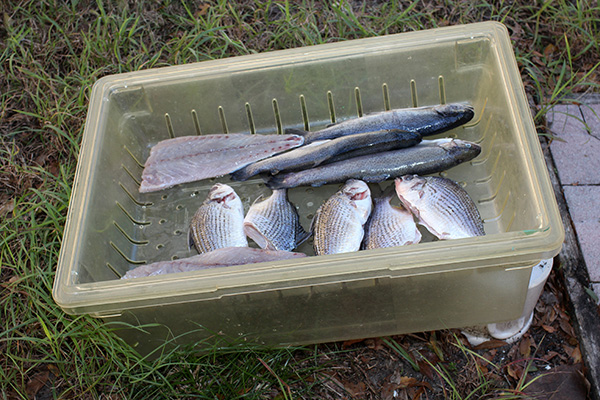
Draining fish.
Conditioning is the term that denotes a brief and light period of drying that is applied to sausages and fish in preparation for smoking. Its purpose is to produce products having outstanding look and quality.
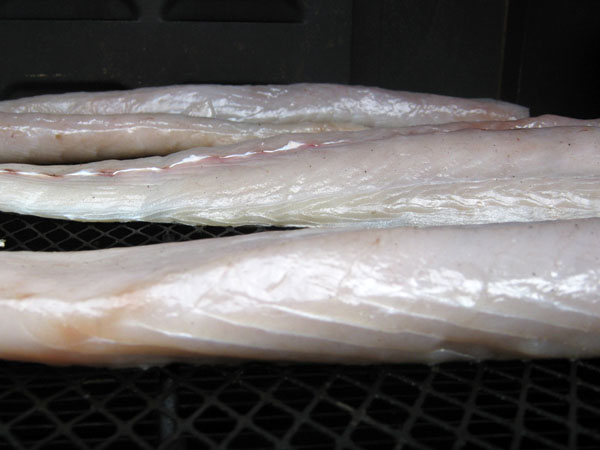
The characteristic flavor of the fish is mainly due to salt and smoke, but the texture and color of its flesh are greatly influenced by drying. Weaker brines or no salting fish at all leaves smoked fish with a rather dull appearance. After brining, the fish are carefully rinsed under cold running water to remove salt crystals and any traces of spices from the surface. Letting them drain for 10-15 minutes will shorten drying.
Before smoke is applied, the surface of the fish must be dry or feel at least “tacky” to touch. A wet surface may attract smoke, but it will also attract undesirable elements of smoke such as soot and other not fully burnt particles. This will darken the surface and create a less attractive color.
There are two types of drying:
Low temperature drying. The purpose is to remove moisture from the surface of the fish. The cleaned fish are placed in a draughty area (fan works well) until they feel dry to touch. The fish can be dried in a smokehouse at 85-100º F (30-38º C). The purpose of this type of drying is to prepare fish for hot smoking and to develop skin gloss. Little fish and fillets will be processed this way. The smoke can be applied when the fish feels dry or tacky to the touch.
High temperature drying. Its purpose is to firm up the fish and harden the skin so its head will not break away from the body during smoking. This is important when large whole fish are hung during smoking. The fish may start drying at 100º F (38º C), but the temperature increases gradually to 158º F (70º C). The smoke may be applied at this stage.
Fish may be patted dry with a paper towel, then left briefly to dry. If insects are present, the fish should be dried out in a preheated smokehouse.
Wet fish are drying until they feel dry or at least tacky to the touch. No smoke is applied yet.
Ideally, drying should be performed without smoke. This is easy to accomplish when the smokehouse runs on electricity or gas. When wood is the heating medium, the logs should be pre-burned first and then added to the fire pit. A thin smoke is acceptable.
Drying can be performed at 100º F (43º C) or higher. The smokehouse should be preheated first. Russian and Polish commercial producers dry fish at 140-158º F (60-70º C). Drying at these temperatures starts destroying bacteria. Make a note that drying at those temperatures will cook surface proteins and cannot be applied to the cold smoking method. Drying toughens the fish so there is less possibility it will break at the head. The fish will continue to dry when hot smoke is applied. Keep in mind that the drying of the fish will be impaired if performed at 75% humidity or higher. All dampers should be open to create the maximum airflow and to facilitate the removal of moisture.
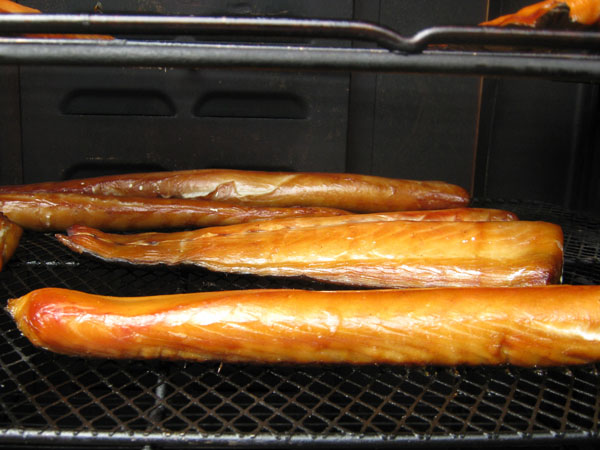
Pellicle
Most smoked products are not eaten immediately but later. They must look presentable and appealing to a customer. Smoked fish should have a glossy appearance; it should shine. This shine, known as “pellicle” is due to the reaction between salt and fish proteins. Salt “swells” the proteins, and they unwind and release some of their contents. Some of those proteins dissolve in salt and become a sticky substance (exudate) that settles on the surface of the fish. After drying, this sticky substance becomes a shiny, clear protein coat known as “pellicle” that may be compared to shoe polish. After smoking, this clear pellicle becomes a shiny lacquer on the surface of the fish. Given that smoked fish acquires a golden color, the pellicle looks golden, too. It can be compared to a shiny wooden parquet floor that was covered with clear varnish. The longer the brined fish are allowed to hang, within reason, the better the gloss that develops. The best gloss develops with 70-80 degree brine. To develop a pellicle, one hour is probably the minimum, but for a large fish, 12 hours or more is not uncommon. Previously frozen fish produces very little pellicle since frozen water crystals rupture the flesh of the fish, permitting some proteins to leak away. If dry salt is applied with pepper and other spices, this gloss will be hardly present as the spices will cloud the surface.
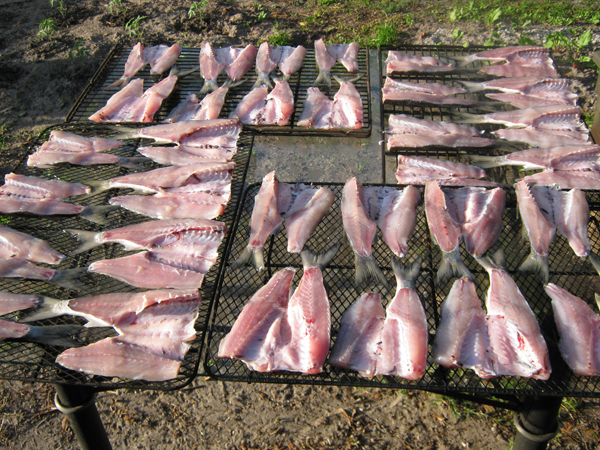
Atlantic mackerel waiting for the smokehouse.
The fish in the lower right corner was sprinkled with a dry mix. It has none of the shine of the fish that was salted or brined with salt alone.
Well-developed pellicle in Spanish mackerel fillet.
Pellicle in smoked fish. The unsmoked fish has a grayish shine, and the smoked fish exhibits a golden gloss.
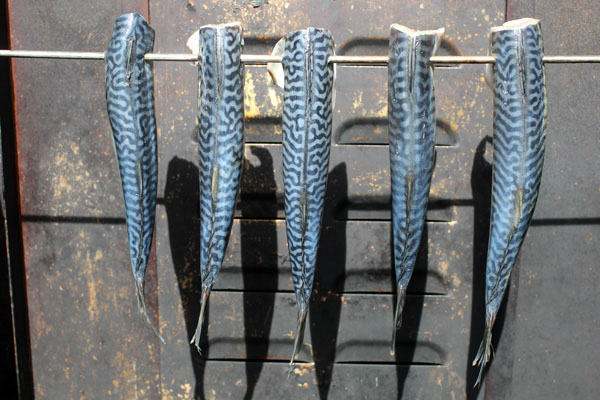
Drying Atlantic mackerel before smoking.
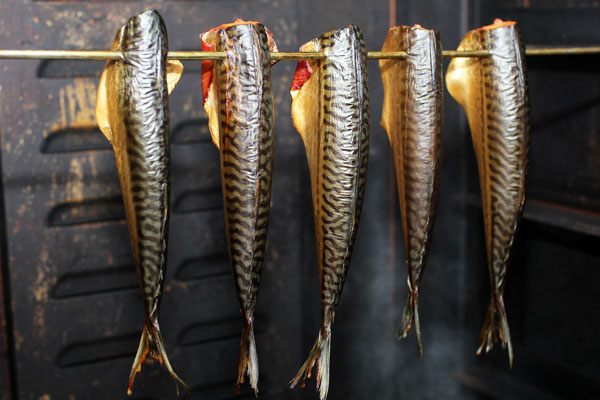
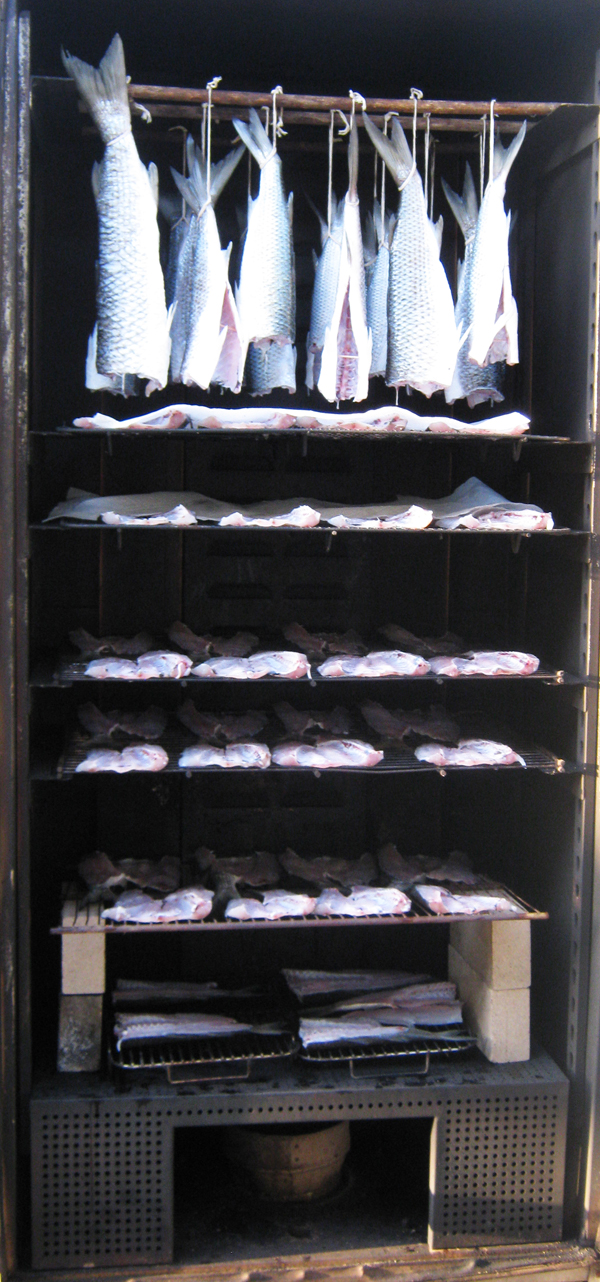
Smoked Atlantic mackerel.
The flesh of fish is delicate by nature, so they have to be handled gently when hanging them. When hanging fillets, it is advisable to leave the skin on. Otherwise, the fillets may break apart.
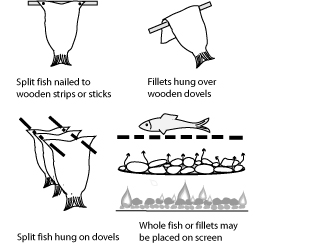
Hanging fillets.

Reinforcing fish with butcher twine.
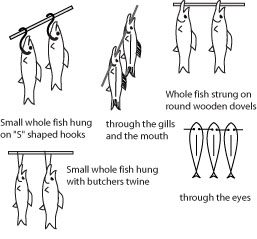
Hanging small fish.
Hanging large fish.
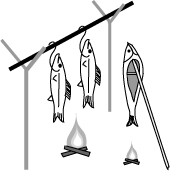
Smoking over camp fire.
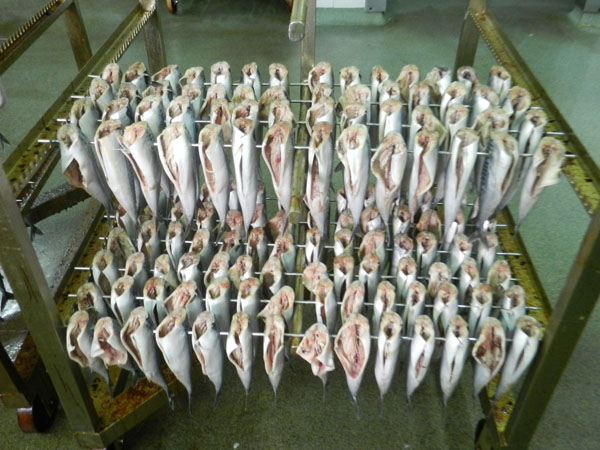
The main difficulty has been that when the split fish such as kippers (split herring) or butterflied mullet are left to drip on trays, a small pool of brine remains in the belly cavity of the fish; this leaves either a wet patch on the fish after smoking or, if the pool dries up, a white curd substance which spoils the appearance of the product. It is possible, however, to overcome this problem by draining the split fish at the angle or by placing them flesh side down.
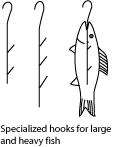
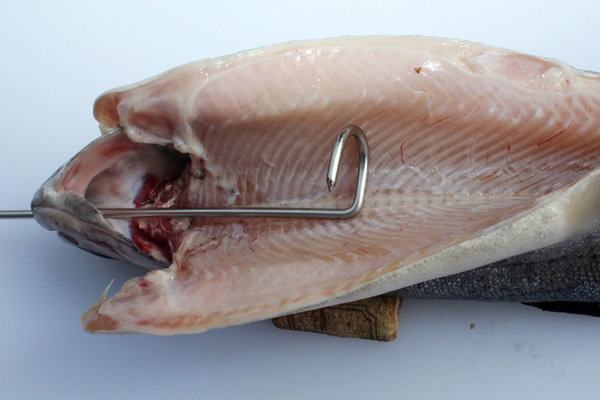
Specialty Hooks
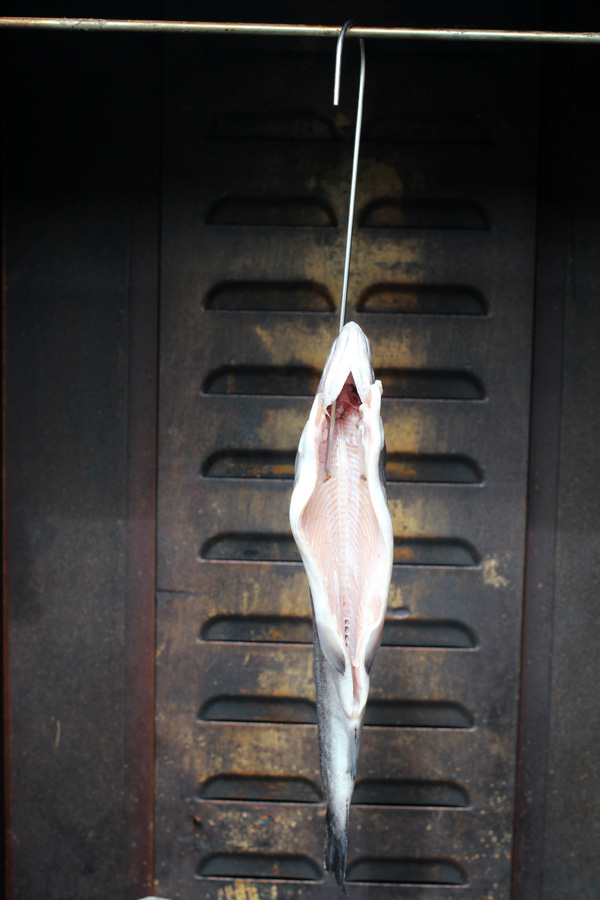
The beheaded or split belly open fish may be hung with a twine loop or by using a specialty hook. Such a hook may be made from stainless steel wire or a wire hanger. This arrangement will prevent fat from dripping down.
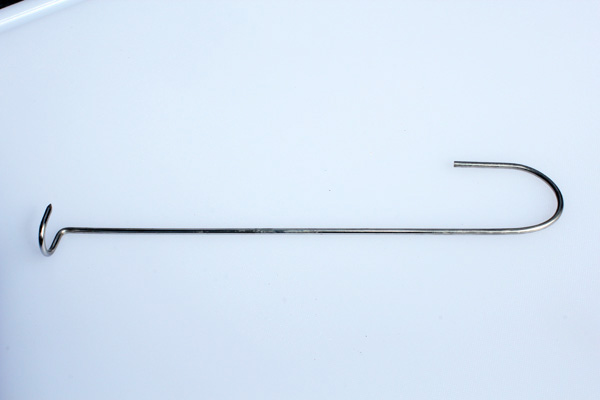
A fish hanging hook.
The hook can be used on a headed or beheaded fish.
The hook goes behind the spine.
Secured fish.
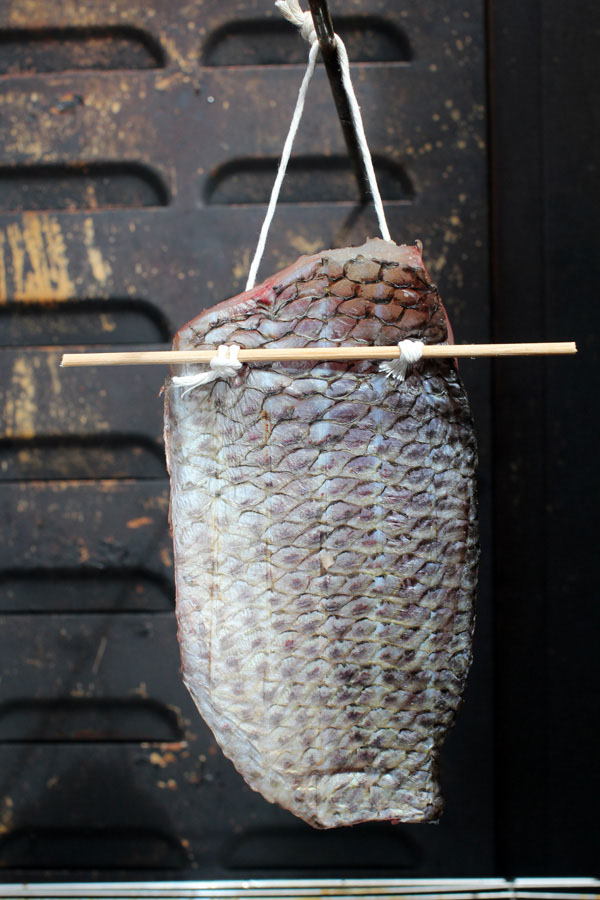
A stick and twine.
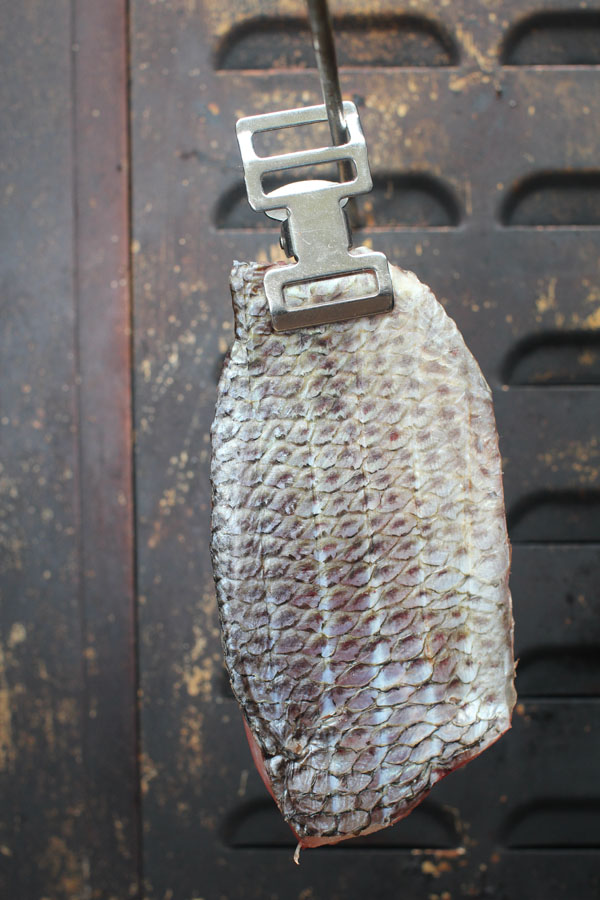
Stainless steel clip.
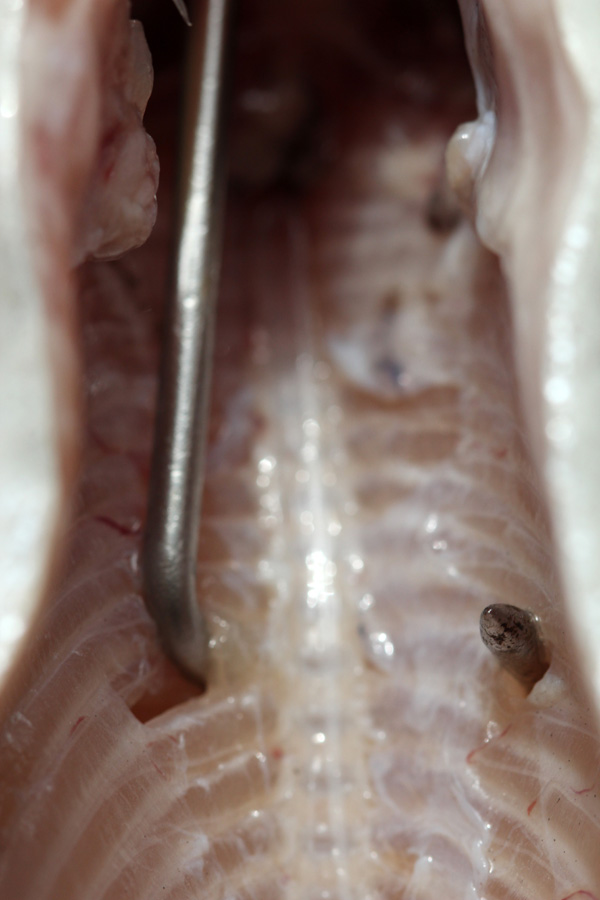
Hardening the Fish
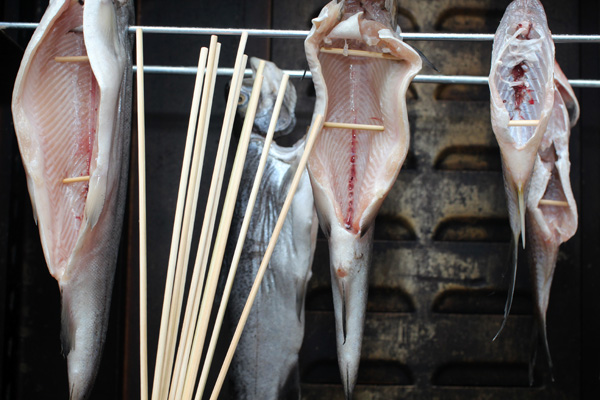
A piece of wooden skewer
or even a toothpick will keep
the belly from closing during
smoking.
Whole heavy fish sometimes breaks free at the head when being smoked. This is often attributed to the high temperature of smoking, however, the high humidity is the factor that compounds the problem. When the fish is inserted on a smokestick through the eyes, a support is created in which the head holds the body. However, there are very few muscles inside the head, just a small amount of connective tissue. The skin contains plenty of connective tissue, which, like the head, contains collagen. In time, this tissue will harden and become stronger, but the drying significantly slows down at high humidity. As a result, the heat builds up inside the head, and the connective tissue softens and melts into gel. The head collapses. This usually occurs only when the humidity is very high and at the beginning of drying or smoking. The solution is to dry the fish at low temperatures (35-40º C) when the humidity is 80-100%. When humidity is at 50-60%, the drying can proceed at 60-70º C. Generally speaking, to increase the mechanical strength of fish, the temperatures during drying and smoking should be increased gradually. The fish will hold its shape better, the flesh will have a firmer texture, and the skin will not separate from the flesh.