Meats and Sausages
Boiling Jams and Jellies
The traditional process of making jams and jellies ended usually with a cooking step. The jars were filled, turned upside down for 5 minutes to check the seal, and the product was cooled and stored. Theoretically, all molds should have been destroyed during cooking, but it was discovered that some fresh molds could enter the jar during the filling operation. The traditional process did not create a strong vacuum inside and there was air available for molds to grow. To prevent molds from growing, a short heating process is employed now. The increased pressure inside the jar forces the air out and prevents air loving molds from growing. This creates a vacuum inside which results in a strong seal.
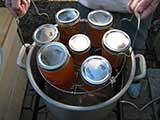
Add more hot water to the water bath canner (if needed) to raise the water level 2 inches over the tops of the jars. Place the cover on and bring the water to a rolling boil.
Bring the water to a boil and process:
- Sterilized jars for 5 minutes.
- Not sterilized jars for 10 minutes. Those extra five minutes will sterilize them and create a vacuum at the same time.
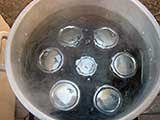
High pressure inside the jars forces the air out what can be observed in the form of bubbles raising up to the surface.
Processing time is counted from the moment the water reaches a rolling boil. Note that those times are calculated at sea level. For an altitude of 1000 feet or more, add 1 minute of boiling time. Take note that boiling jars for 10 minutes might result in a weaker gel, so it is recommended to always sterilize jars before filling and processing them for 5 minutes only.
The heating source is switched off and after a few minutes the canning rack with jars is removed.

