Meats and Sausages
Mixing Meat
The purpose of mixing is twofold:
- To mix meat particles with other ingredients
- To create exudate, a sticky substance that creates proper texture
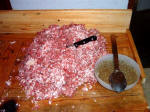
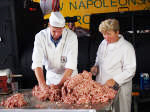
Mixing meat by hand raises its temperature, so it should be done quickly to prevent the growth of bacteria, but well enough to extract proteins and produce exudate. The ingredients may be premixed with cold water in a blender and then poured over during mixing. The water helps to distribute the ingredients evenly and softens the mass for stuffing. We can easily add 1 cup of cold water to 5 lbs. of meat because it will evaporate during smoking and cooking. It is possible to bind {lock) some of this water to make the product more juicy by adding ingredients such as soy proteins, non-fat dry milk, phosphates or gums (hydrocolloids). A rule of thumb calls for about 8% of water in relation to the weight of the meat. It only takes 5 minutes to mix 5 - 10 lbs of meat by hand. The time is important because fat specks melt at 95-104° F (35-40° C). We want to prevent this smearing to keep the sausage texture looking great. The temperature of the sausage mix should be between 0-5º C (32-40º F). If this temperature increases, the sausage mix should be cooled in a refrigerator before proceeding to the stuffing step.
Exudate. If the meat/fat mixture is not mixed adequately (then the salt/myosin reaction will be minimal, and the water holding capacity and the meat binding capacities will be reduced.Apply some force when mixing; kneading might be a better word for it. This will help to extract proteins. Meat proteins are released due to cutting or grinding action and then dissolve in salt and water. As a result, a sticky protein-salt-water solution known as exudate is created, which binds meat particles with other ingredients. This glue-like solution gives sausage an excellent texture.
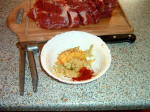
If the meat was previously cured, salt, nitrite, and sugar were already added. Now, we have to add the remaining spices. They can be mixed with cold water and poured over the minced meat. The water helps to distribute the ingredients evenly and softens the mass for stuffing.Water should not be added to uncooked sausages, which will be cold-smoked, slow-fermented, or air-dried.
When mixing meat with ingredients, it is best to follow this sequence:
- Minced meats, starter culture, nitrite/nitrate, spices.
- Minced fat.
- Salt.
There are some people who like to add spices to meat during the grinding step. Then, they will mix it again. Some don’t mix, but grind meat through a big plate 3/4” - 1”, then add spices to ground meat and regrind it again through a 1/8” plate. Some say that placing salt in a grinder harms a cutting knife and should be avoided. The easiest procedure for someone using a manual grinder is to grind the meat first and then mix it well with all ingredients.
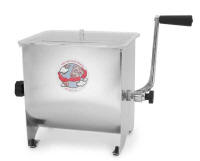
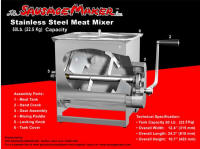
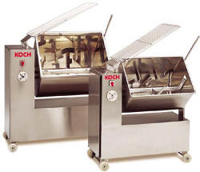
Mixing introduces spices and flavorings into the previously minced meat. Home-based sausage makers use a grinder to mince the meat which is then mixed by hand with other ingredients. The mechanical mixer is necessary when over 50 lbs. of sausage is produced, as the task is physically demanding. There are small manually cranked mixers designed for a hobbyist, and they will accommodate 25-50 lbs. of meat. Remember that for limited home production, a small mixer has some shortcomings. It must be:
- washed before use.
- washed in hot water after the use.
- stored somewhere.
It makes little sense to go into all this trouble to mix 5 lbs. of minced sausage mass when the same task can be accomplished in 5 minutes using hands and any suitable container. The meat should be placed in a big container to facilitate mixing it by hand. The container should be made of stainless steel, stone, or food-grade plastic. Remember to taste your sausage now, before stuffing, since you still have time to implement any changes. Make a tiny hamburger anf fry it, it will take only a minute or two.
Tumbling
Originally, whole cuts of meat were either dry-cured or immersed in brine. This required an investment in time and storage space. Today, the majority of meats are injected with a solution of salt, nitrite, phosphates, sodium erythorbate, and other ingredients and flavors. The operation is performed by a bank of about 30 needles, which inject a solution under pressure into the meat. There is a limit to how many needles can be inserted as this procedure creates holes and affects the internal structure of the meat. The tumblers come into play to evenly distribute the injected solution inside. They offer the following advantages:
- Curing solution is distributed evenly inside of the meat.
- Curing times are greatly reduced.
- Mechanical action leads to stronger extraction of meat proteins, and more exudate is created, which helps bind meat cuts together.
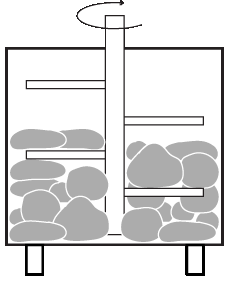
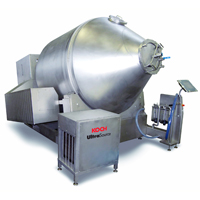
All tumblers employ a similar principle of operation: a set of paddles rotate inside a tank, bouncing meat pieces around. Some units operate under a vacuum, which further improves the results.
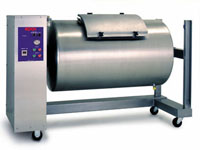
The tumbler is a machine with a rotating drum. The meat pieces bounce around its moving walls, providing better brine distribution inside the meat. Tumblers normally are horizontal units where the paddles strike the meats, which fall and are moved up again by the rotating paddles. A tumbler resembles a cloth dryer, which moves wet clothing around using a rotating drum with paddles. Using vacuum tumbling, meat, poultry, fish, and seafood processors can produce ready-to-cook, value-added products while reducing labor content and increasing product yields. Vacuum tumbling offers improvements to product sliceability, cure color, and overall product juiciness and tenderness, which results in higher profitability.
Small products (below 2.5 inches in diameter) can be marinated and tumbled within minutes. Large (2.5 inches or larger) products can be marinated using a combination of injection and tumbling. Large whole muscle meats are normally injected with brine.
The primary purpose of tumbling these products is optimal protein extraction, which will allow individual pieces of meat to stick together during the cooking process. Due to renewed public interest in making quality products at home, smaller tumblers (8 and 15 lbs.) are carried by sausage-making equipment and supplies distributors.
Massaging
Massagers generally are vertical units and offer more delicate action than tumblers. Meat pieces rub against each other or the surface wall of the massager without loss of contact. Although the actual massaging or tumbling time is only about 1-3 hours, this action is continuously interrupted, and meats are allowed to rest. The process generally continues for about 24 hours at low temperatures. The machines are normally loaded 1/2 - 2/3 capacity. Due to their gentler mode of operation, massagers need more time than tumblers to perform the same task.
The machine comes standard with cooling and has a uniquely designed baffle that rotates and slides the product throughout the drum during processing. This results in the product remaining against the walls and baffles of the drum versus the actual tumbling delivered by competitor models. The advantage is a more gentle massaging action while extracting protein in a highly efficient manner under a constant vacuum.
Benefits
- Improved product quality (juicier, more tender, and flavorful).
- Increased profit margins through the delivery of ready-to-cook, value-added products.
- Increased productivity through reduced handling/processing time.

